
tweepy Quickstart: Basic App Creation, Configuration and Manual Authentication
[ ]I recently wanted to set up tweepy, to drive a little content-feed Twitter bot via Github Action. The tweepy docs have a pretty thorough how-to for setting up authentication, but it seemed pretty complicated and daunting, and seemed to be targeted at someone needing to set up automated 3rd-party app authentication for users.
Since all I needed was to authenticate for an account under my control, I went looking for a simpler way. Searching around, I first came across a Gist showing a method for deleting old tweets. Shortly after that, there was actually a similar item on Python Bytes
![]() (Episode 192, Item 5) about a different Gist with a similar purpose. After some fiddling, I boiled the process down to a minimal procedure for setting up a
(Episode 192, Item 5) about a different Gist with a similar purpose. After some fiddling, I boiled the process down to a minimal procedure for setting up a tweepy.API instance for manual use, interacting with a Twitter account that you control.
High-level, you need to (1) authenticate an app attached to a Twitter developer account, and (2) authenticate for interactions with a specific Twitter account/timeline. For this purpose, the Twitter app defines the specific read/write permissions to be permitted to tweepy. In more advanced uses, the app also is where you define things like callback endpoints for 3rd-party authentication.
Note that as of this writing (Oct 2020), Twitter’s Developer dashboard and new v2 API are under active development, so some of the details here may become incorrect over time. Feel free to ping @pylogging
![]() if these instructions ever stop working.
if these instructions ever stop working.
1. Activate Developer Account
The first step is to create a Twitter developer account, if you don’t have one already. Log in to Twitter, and then navigate to developer.twitter.com and follow the Getting Started pathway. This process involves a bunch of questions, most of which I didn’t really have detailed answers to. But, answering everything along the lines of “I want to fiddle with the API” seemed to work fine.
Even though it said at the end that the developer account could take up to a day to activate, it gave me access pretty much immediately. YMMV.
2. Create App
As of Oct 2020, an app can live in one of two contexts: standalone, or as part of a project. Both of these seemed to work fine with tweepy; for my exploration thus far, I’ve just used standalone apps.
1) Navigate to the Developer Portal from the landing page

2) Navigate to the Projects & Apps > Overview dashboard page
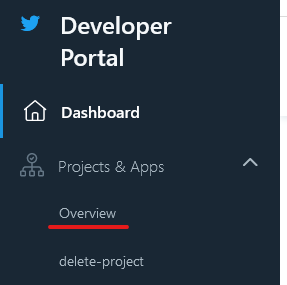
3) Scroll to the bottom of the Overview page and click the “Create App” button

(Click to enlarge)
4) Choose an app name and click “Complete”
3. Store App Key Pair
The next page shows the API key, API secret key, and bearer token for the app you’ve just created. You’ll want to store at least the API key and API secret key someplace permanent, such as local environment variables. While I’m sure the bearer token is important for some types of API interactions, I’ve never needed to use it for posting and deleting tweets on my own Twitter account.
I try to name my environment variables something memorable and unique, to make it obvious what they are and to avoid later collisions. For this, I used TWITTER_KEY and TWITTER_SECRET_KEY—if I’d been working on a specific project, I would have added something related to that project to the names. (On Windows, you’ll want to start a new cmd instance after defining these variables, in order for them to be visible to Python.)
This should go without saying, but: as with all secrets do not commit them into any repo! If you end up wanting to use them in CI or some sort of automated process, use whatever secrets machinery is exposed by the provider.
4. Configure App
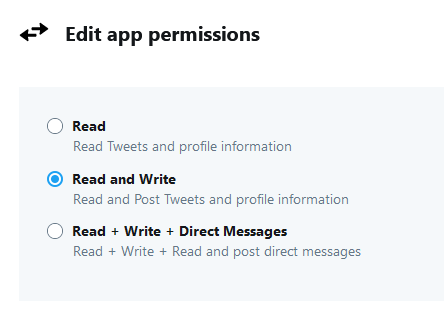
If all you want to do is retrieve tweets, then no specific configuration of the app is required—the default “Read” permissions enable access to all tweets visible to your Twitter account.
If you do want to post and delete tweets, you have to go into the app settings and upgrade the app permissions from “Read” to “Read and Write.” If you want the app to have access to your DMs, then you have to bump the permissions all the way to “Read + Write + Direct Messages.”
You can also customize the text description of the app, if you want. I typically haven’t bothered.
I’ve never needed 3-legged OAuth for reading/writing my own tweets.
5. Generate and Store Access Token Pair
The app key pair from step 3 just authenticates permissions to use the Twitter developer app that you created in step 2; it doesn’t actually give permissions to interact with your Twitter timeline, read or write.
To get the tokens needed to actually intereact with the Twitter API, start by firing up a Python interpreter and creating an authenticated tweepy.OAuthHandler:
>>> import os
>>> import tweepy
>>> auth = tweepy.OAuthHandler(os.environ["TWITTER_KEY"], os.environ["TWITTER_SECRET_KEY"])
Then, you have to use auth to request an authentication URL:
>>> auth.get_authorization_url()
'https://api.twitter.com/oauth/authorize?oauth_token={OAUTH_TOKEN}'
{OAUTH_TOKEN} will actually be a token hash; I’ve redacted it here.
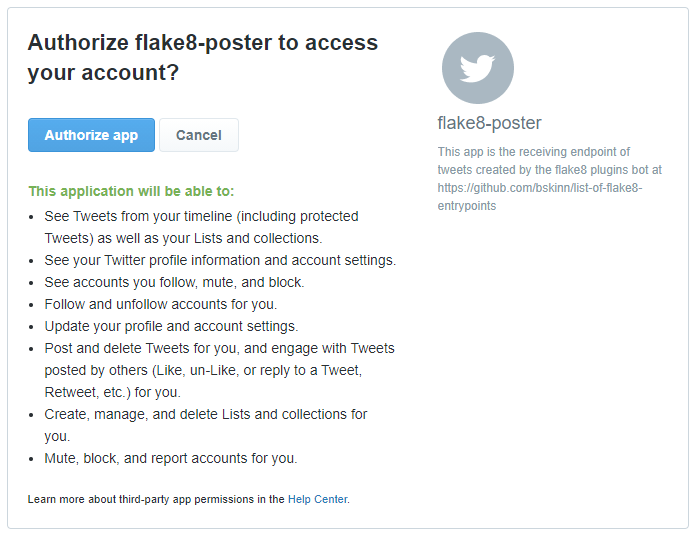
Using a browser logged in to the Twitter account you
want to use with tweepy, navigate to this authorization URL.
You should see an authorization confirmation page like the following:
(Click to enlarge)
Click to authorize, and Twitter will supply a numerical PIN (redacted here):
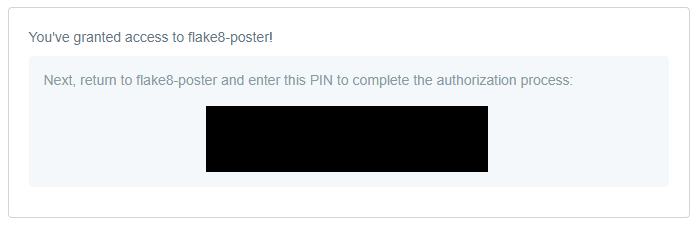
(Click to enlarge)
Return to Python and use that numeric PIN (passed as a string) to request the access tokens:
>>> auth.get_access_token("{PIN}")
('{USER_TOKEN}', '{USER_SECRET_TOKEN}')
{USER_TOKEN} and {USER_SECRET_TOKEN} will both be hashes. Save them!
I used the TWITTER_TOKEN and TWITTER_SECRET_TOKEN environment variables.
6. Using the Stored Secrets to Bootstrap tweepy
Once you have the secrets from steps 3 and 5 stored in environment variables, bootstrapping tweepy in subsequent Python sessions only takes a handful of lines, the first few of which are the same as in step 5. (As above, on Windows you’ll want to start a new cmd session so that the new environment variables are accessible.)
>>> import os
>>> import tweepy
>>> auth = tweepy.OAuthHandler(os.environ["TWITTER_KEY"], os.environ["TWITTER_SECRET_KEY"])
>>> auth.set_access_token(os.environ["TWITTER_TOKEN"], os.environ["TWITTER_SECRET_TOKEN"])
>>> api = tweepy.API(auth)
This will give you a fully authenticated api instance, from which you can do
(most?) all the tweepy things.
The main methods I’ve used are:
>>> api.get_status("{TWEET ID}")      # Retrieve a tweet
>>> api.update_status({MESSAGE})      # Post a new tweet
>>> api.destroy_status("{TWEET ID}")  # Delete a tweet
All three of these methods return a tweepy.Status instance for the corresponding tweet.
api.get_status() can retrieve any tweet visible to the Twitter account authenticated in step 5.
api.update_status() and api.destroy_status() can only create/delete tweets on the
timeline of the step 5 Twitter account.
Happy tweeping!
This post was written with StackEdit.